This Instructable explains each main step of construction for building vertical earthbag walls. Videos on my Earthbag Natural Building YouTube channel demonstrate the process.
For those who don’t know, earthbag building uses polypropylene rice bags or feed bags filled with soil or insulation that are stacked like masonry and tamped flat. Barbed wire between courses keeps bags from slipping and adds tensile strength. The final plastered walls look just like adobe structures. Thousands of people are now building with bags to create their dream homes, home offices, shops, resorts, rootcellars, storm cellars and survival shelters. Non-profit organizations are building schools, orphanages, emergency shelters and other structures.
I got involved with earthbag building when the Indian Ocean tsunami hit Southeast Asia in December, 2004. As the director of Builders Without Borders at that time, I searched all available affordable, sustainable building methods and decided building with bags was the most practical. They’re flood resistant (used for flood control), earthquake resistant (passed an ICBO shake table test), bullet and blast resistant (used for military bunkers), and now engineer and code approved plans are available. Just search for earthbag house plans on the Internet.
Our websites at EarthbagBuilding.com and Earthbag Building Blog explain just about everything you need to know for free. And if you’re looking for house plans, my Earthbag House Plans site features over 110 sustainable plans that can be purchased through Dream Green Homes. My new Earthbag Building Guide and Earthbag Building DVD are now available.
The following instructions assume you have cleared and leveled the site, removed topsoil, positioned fill soil around the building site to minimize work, dug a trench to stable subsoil, put about 12” of gravel in the trench, and added corner guides and stringlines.
Step 1: Tools and materials
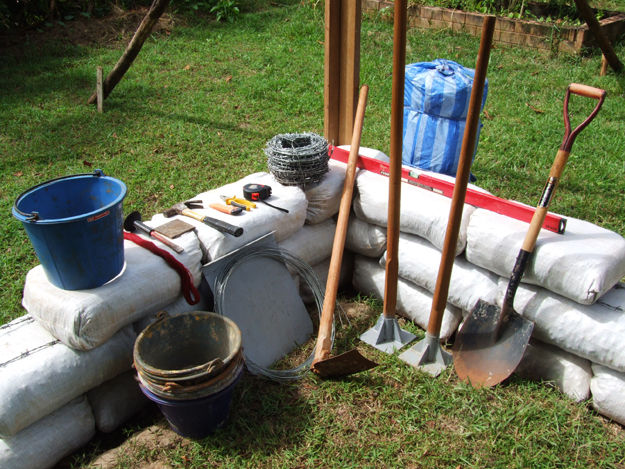
Step 1. Tools and materials (listed left to right): woven polypropylene bags (about 18” x 30”), bucket chute (4-gallon bucket with bottom cut off), 4 or 5 heavy duty 2-gallon cement buckets, stringline, metal chisel and scrap steel for cutting barbed wire (or bolt cutters), hammer, sheetmetal slider (about 13” x 16”), 15 gauge galvanized wire, knife, wire cutters, tape measure, 4-point barbed wire, corner guide, grub hoe or grape hoe, level, tampers, bundle 500 bags, shovel.
Step 2: Fill the bags
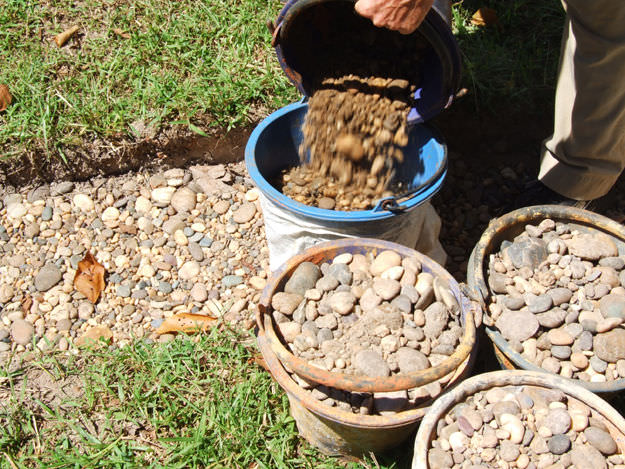
Step 2. Fill the bags: Use the same number of buckets for each bag. Fill bags approximately 90% full, leaving just enough to sew the bags closed. This technique ensures each bag is filled to capacity to save bags, and each bag is the same size, which helps keep walls level.
Step 3: Sew or stitch the bags closed
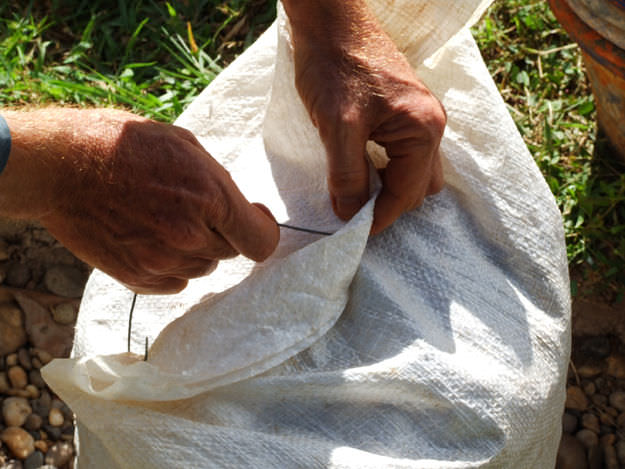
Step 3. Sew or stitch the bags closed: fold the bag end over; use 15 gauge wire about 9” long with one end cut at a sharp angle; make one stitch on one side and bend the end over; make a stitch in the center and pull the corner over; make a stitch in the other corner and pull the corner over; poke the remaining wire into the earthbag. This technique facilitates handling, prevents spills and enables bags to be filled to capacity.
Step 4: Gravel bags on lower courses
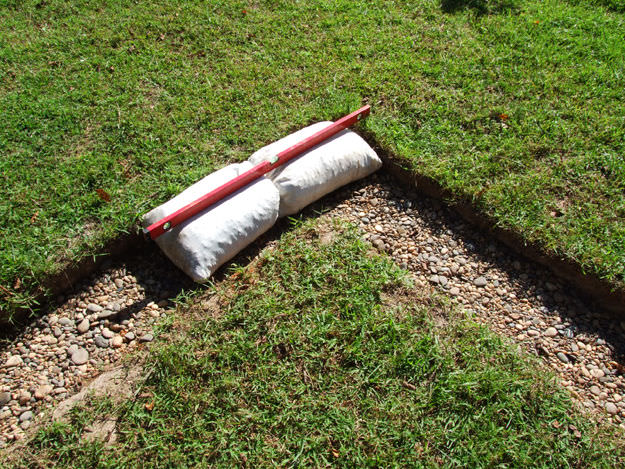
Step 4. Lower courses: place gravel-filled bags (double-bagged for strength) working from the corners and openings to the center. Align bags to stringline; tamp the bags solid and level after the course is complete. Always put tops of bags (the ends you’ve sewn closed) butted against other bags to prevent spillage. Maintain a running bond as in masonry.
Step 5: Add barbed wire
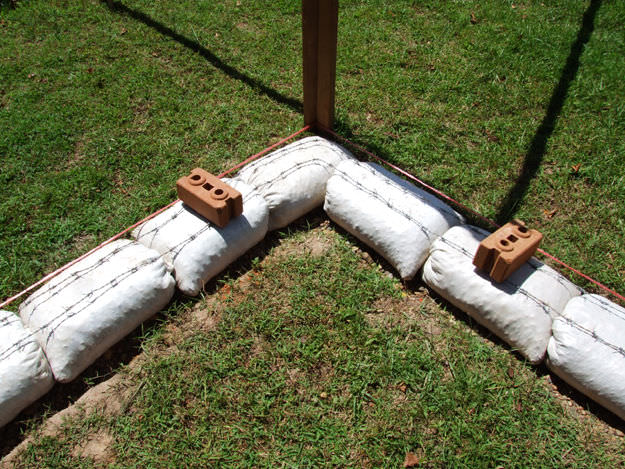
Step 5. Add barbed wire: use two strands of 4-point barbed wire in-between each course of bags; bricks or stones temporarily hold the barbed wire in place.
Step 6: Place additional courses with sheetmetal slider
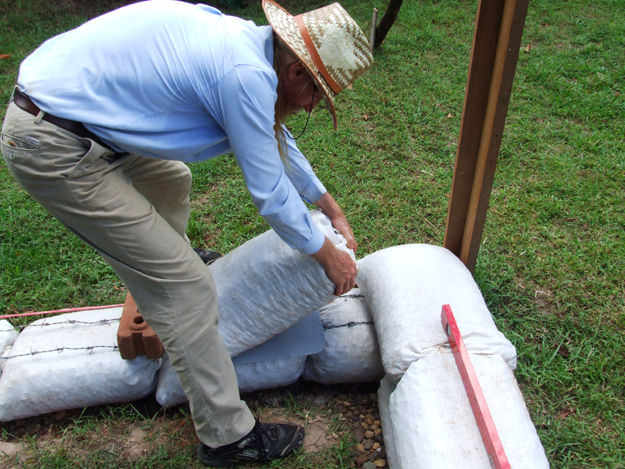
Step 6. Use a sheetmetal slider to place additional courses so bags do not snag on the barbed wire: fill the bags on the slider; sew the end closed; tilt the bag into position and push it against the previous bag. After the bag is aligned, hold the end of the bag and jerk the slider out. Continue with gravel-filled bags until you are safely above the height where moisture can cause damage.
Step 7: Repeat the process using earth-filled bags
Step 7. Repeat the process using earth-filled bags for upper courses, but with a few minor changes: turn bags inside out to avoid protruding corners; use lightly moistened soil; lightly tamp the contents after each bucket of soil is added; pre-tamp each bag after it is aligned in position. This last step lengthens each bag to ensure good overlap.
Step 8: Make custom-sized bags
Step 8. Make custom-sized bags to fill odd-sized spaces: measure the opening; fill the bag to the approximate level; cut off excess bag material; fold each side of the end toward the center and tuck under the bag; place the bag in the wall.
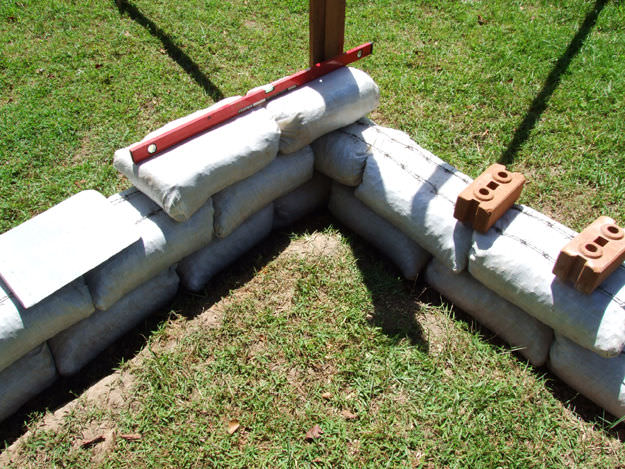
Step 9: Tamping
Step 9. Tamping: Tamp earthbags solid and level after each course is complete. Tamp the high points first. Once the wall is approximately level, evenly tamp the entire wall several times as you continually move the tamper so as not to create low spots.
Repeat the process for the remainder of the walls, adding doors and windows as you go. Check often to keep walls plumb and level.
If you like this Instructable, please check out my other one that covers almost every detail for building a roundhouse: How to Build an Earthbag Roundhouse
Photos and videos by Got Chankamol. Featured image by Allesandro Valli. Originally published on Instructables. CC BY-NC-SA.