The Pain Mound is a large pile of woody biomass, aka mulch. Invented by French farmer Jean Pain in the 1970s, it is made of woodchips and sawdust, surrounded by a ring of hay bales for structure and insulation. As the Pain Mound decomposes, heat is produced and harnessed using a hydronic loop. The Pain Mound will produce heat for up to 18 months, after which time the remains (nutrient rich, earthy humus) can be used to build soil.
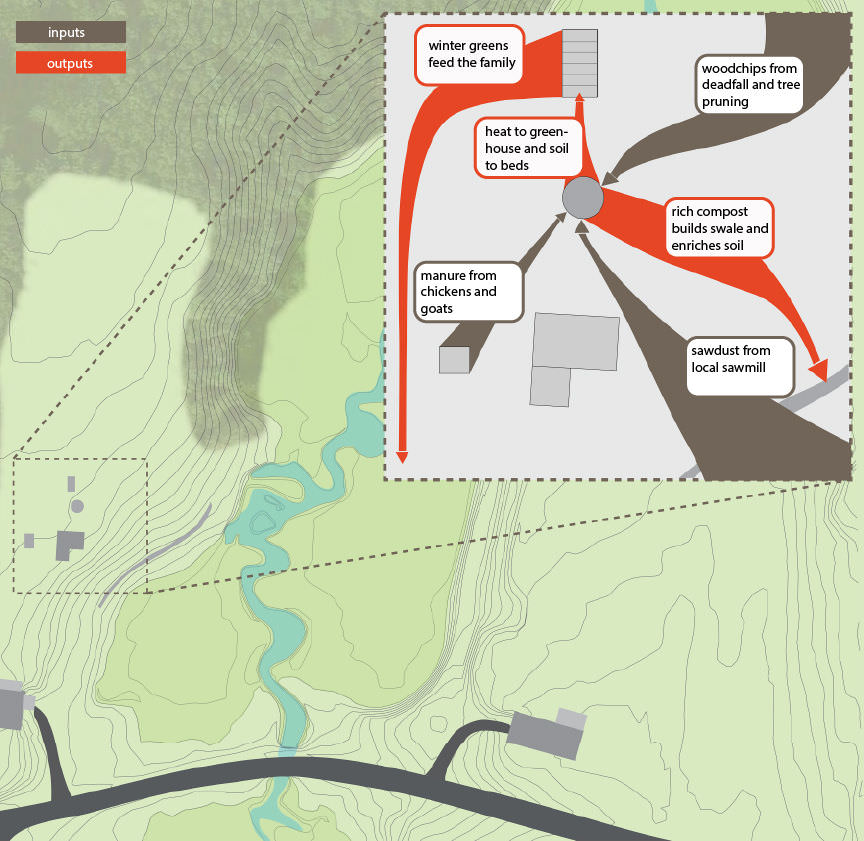
Inputs and outputs for the compost heating system
Step 1: Lay Out the Mound

Stake out a circle approximately 12 feet in diameter. Purchase hay bales from a local farm, collect fallen trees and branches, and rent a chipper. A load of sawdust can usually be procured from a local sawmill: they will often deliver for a nominal fee.
Step 2: Create a Hay Bale Backstop + Add Aeration
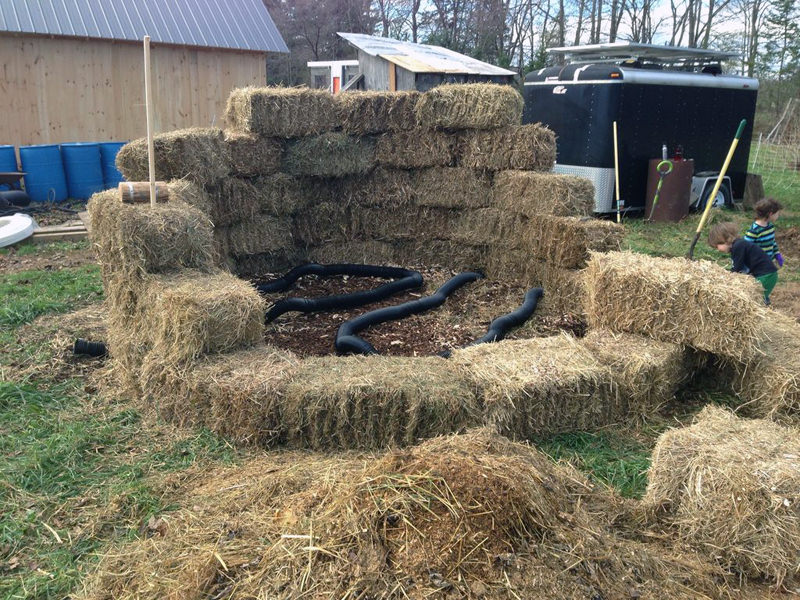
The Hay Bale Backstop + Aeration
Lay about 15′ of perforated 4″ tubing at the bottom of the mound, with each end protruding out of the perimeter. Create a “backstop” of haybales to catch the woodchips as they are thrown from the chipper into the mound. Chip a layer of woodchips approximately 1′ high into the mound on top of the aeration pipe.
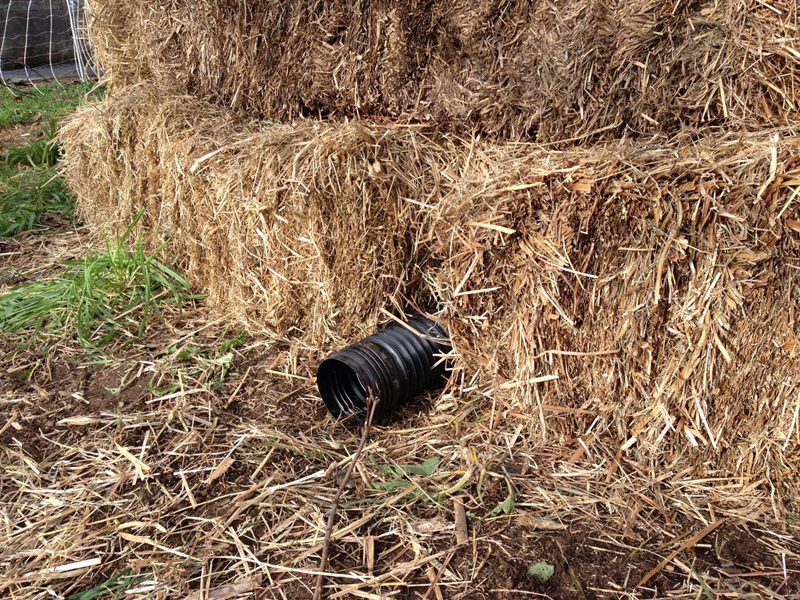
Aeration pipe sticking out
Step 3: Lay the Hydronic Loop
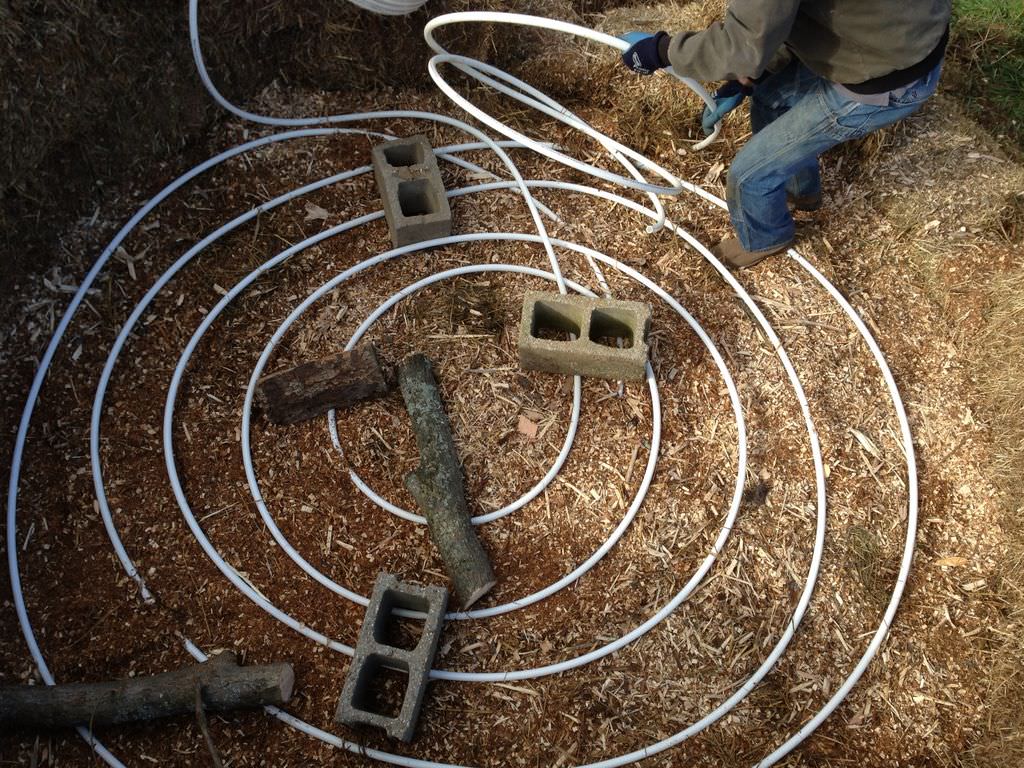
Laying out the hydronic loop
Coil 1/2″ plastic pipe at the bottom of the mound and hold it down temporarily with cinder blocks. Run the end of the pipe outside of the ring of hay bales, to be connected to your water source.
Step 4: Chips and Sawdust!
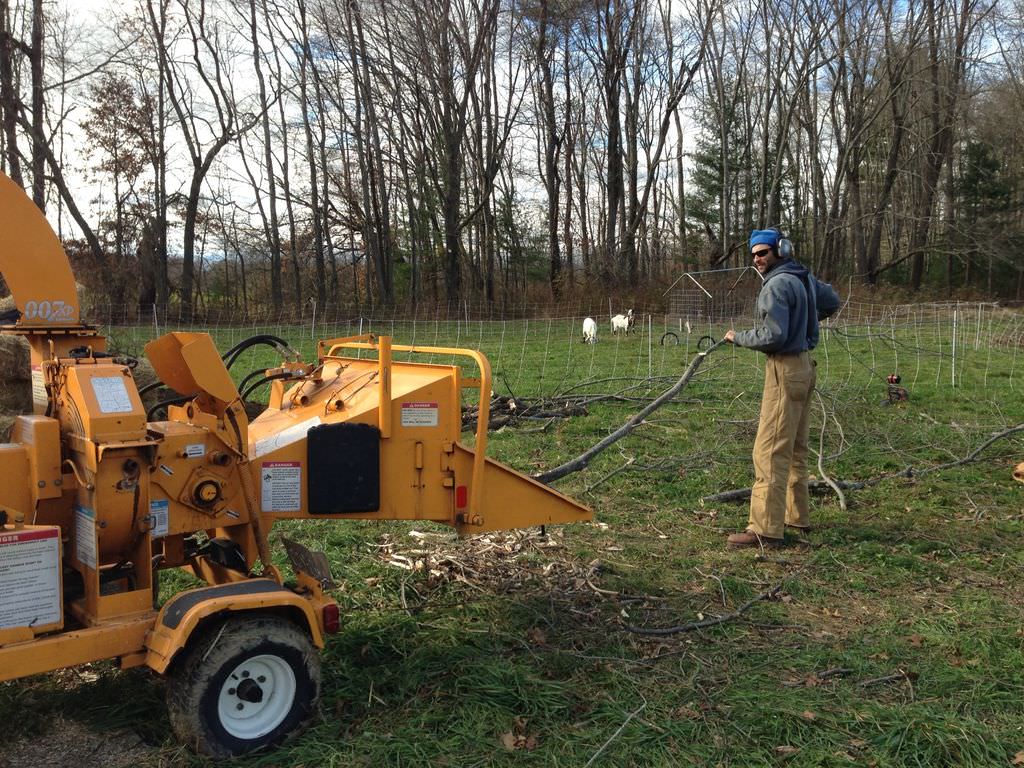
Chipping wood “fuel” for the pile
Chip wood into the pile, intermittently stopping to throw shovelfuls of sawdust in. The high carbon content of both materials create a lot of heat when decomposing.

Lots of chipping…
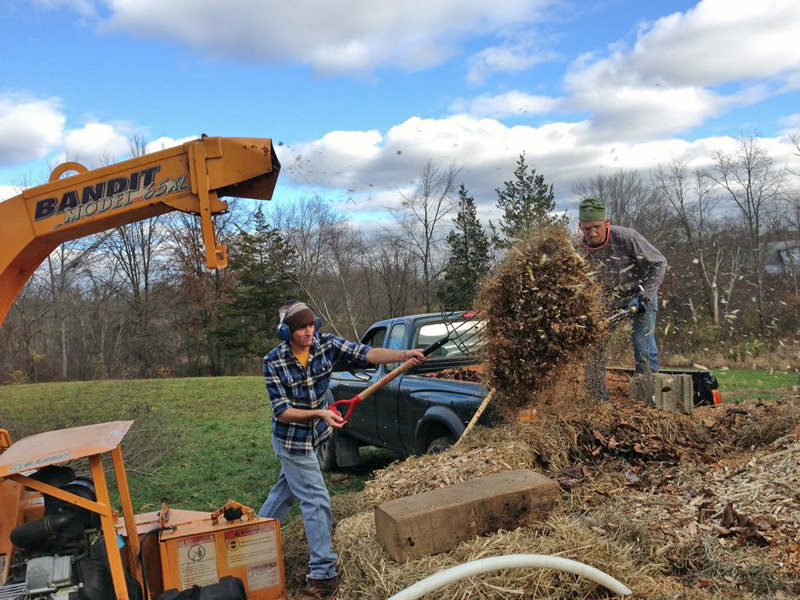
Lots of shoveling too!
Step 5: Continue Laying Water Pipe + Building Up the Mound
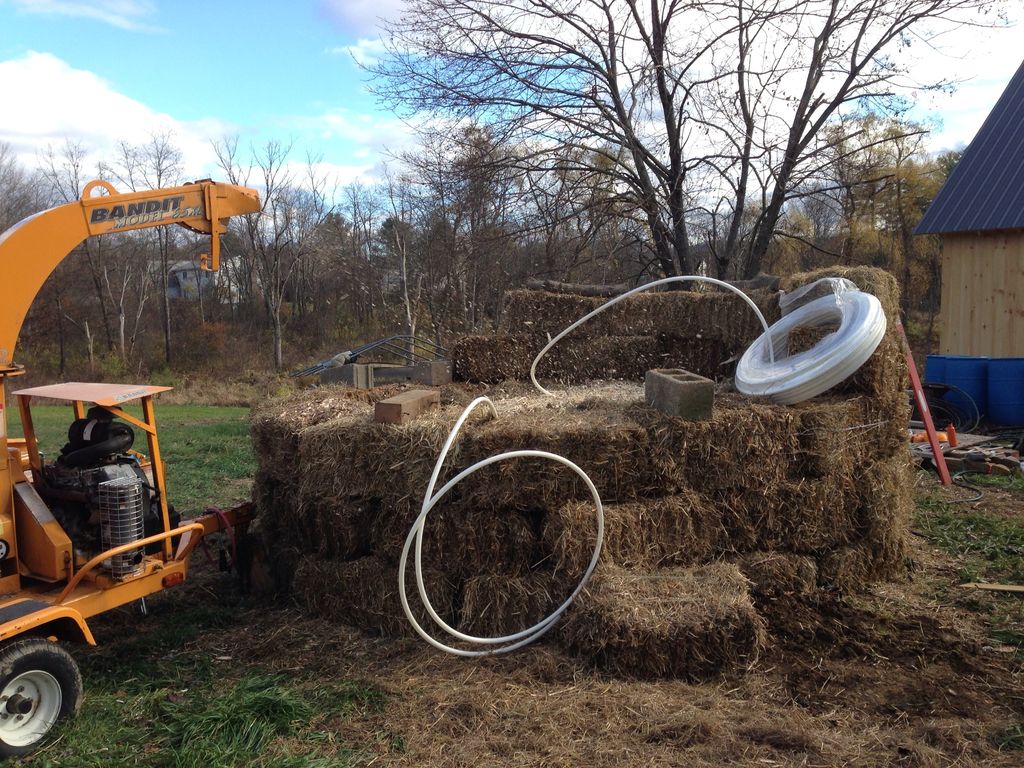
Continuing laying the water pipe
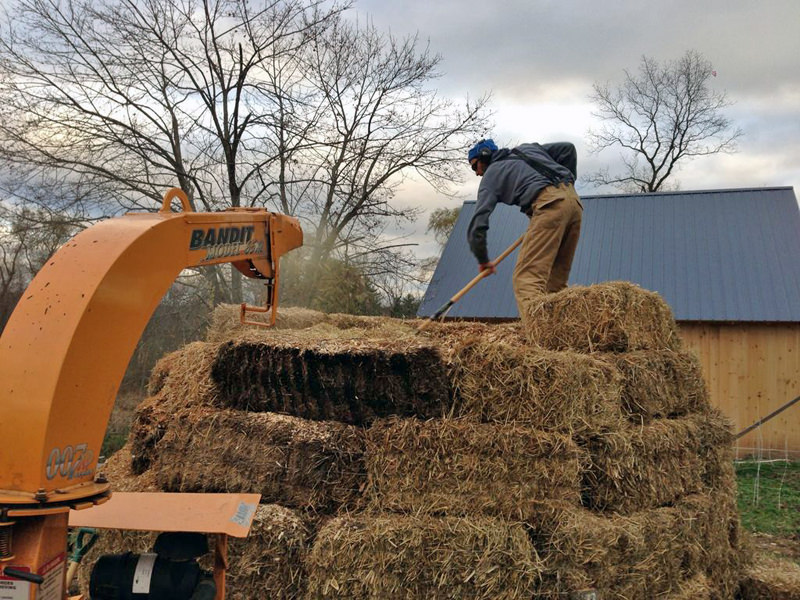
Building up the mound
Once you get started, this project should take 1-2 days of labor. Keep looping in water pipe and building up the hay perimeter as you add woodchips and sawdust. Throw in some manure – any animal will work – if you have any.
Step 6: Fill Line with Water
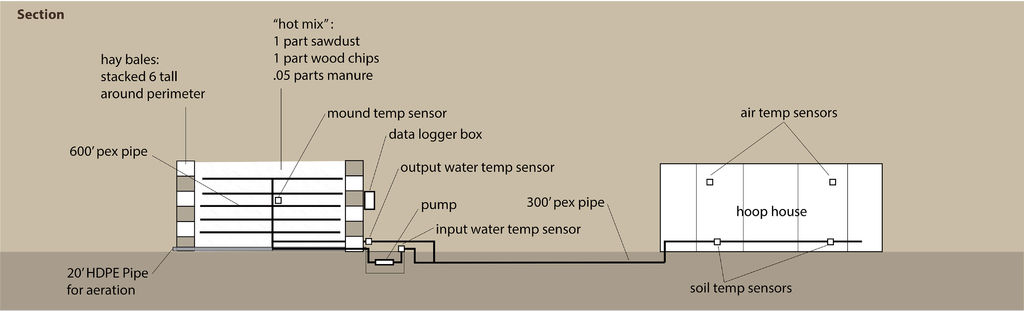
The Pain Mound can be used to heat hot tubs, greenhouses or hydronic heating systems. Plan out your location carefully ahead of time so that you are close to the thing you will be heating. In the diagram shown here, we hooked up a pain mound to a greenhouse. We buried the water lines so that we would not lose additional heat to the outdoor air.
For more information, CompostPower.org has an excellent detailed installation guide, which can be found here: http://www.compostpower.org/node/24
Step 7: Track the Heat Output
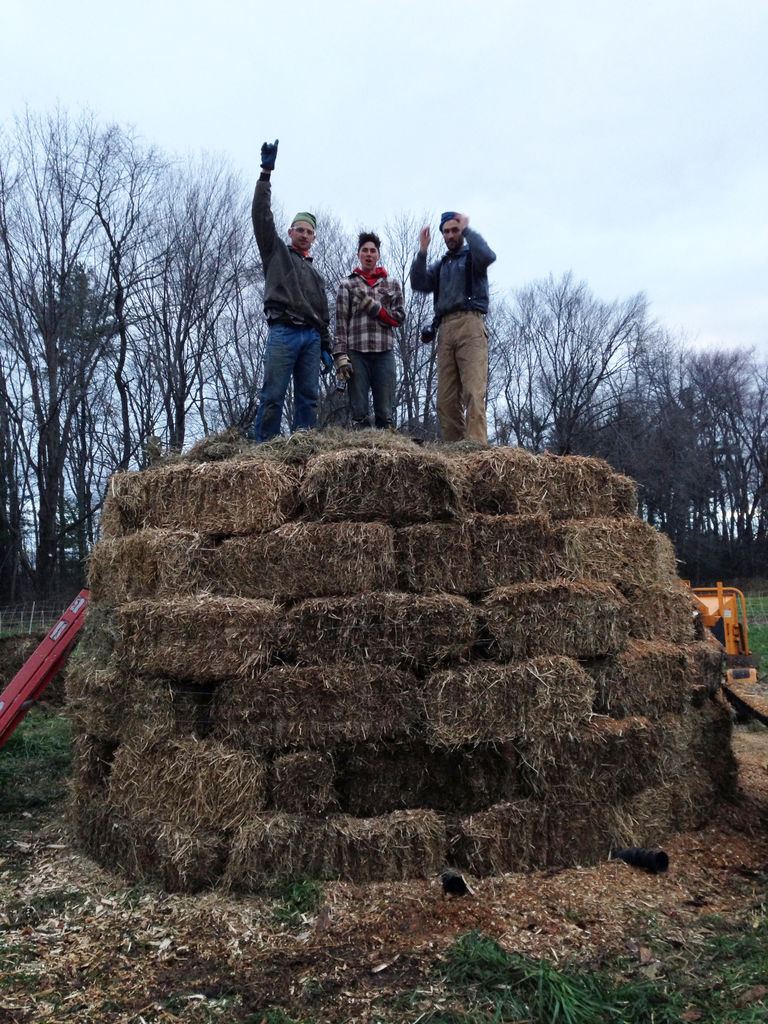
Celebrate!
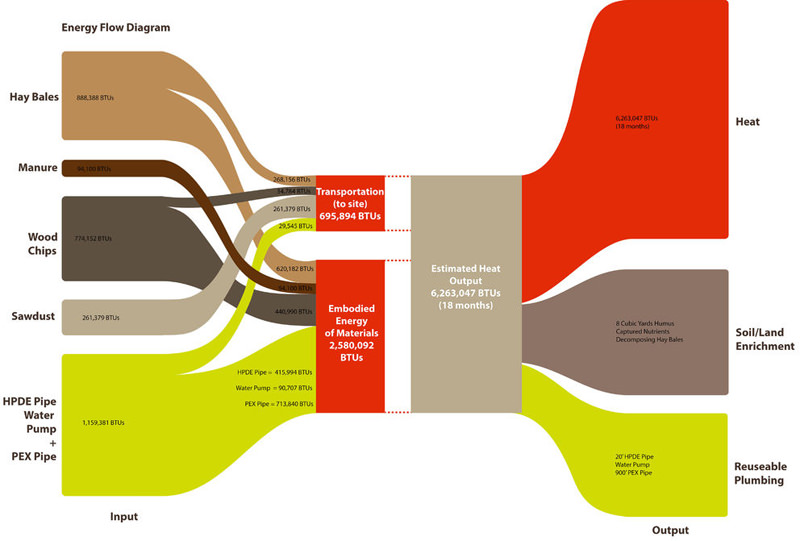
Tracking the BTU output gives you tons of interesting information
If possible, consider including a series of temperature sensors with your water pipes, so that you can track the BTU output along the way. Our mound produced more than 6 million BTUs over a period of 12 months, including a freezing New England winter.
Collaborators: Garth Schwellenbach and Jesse Selman
Originally published here. License: CC BY-NC-SA